Changes ahead

Hello everyone. I’ve been a little quiet over here in blogging recently but that’s because in real life loads has been happening and it’s been exhausting going through it, let alone writing about it all. I wish I could say that things are calming down, but far from it. However I thought I’d been neglecting you all so I’m here to give you an update.

At the end of July my oldest sister, Bryonie, got married and I was a bridesmaid. So Tobi and I trekked up to Glasgow for the wedding and four nights blissfully child-free.

image

image

Me looking a bit like Amy Winehouse and classy with a cigarette in my hand.

My sister asked me to make a ring pillow for the wedding to fit inside a teeny bowl she had bought for my nephew, the ring bearer, to carry up the Isle.

image

image

It only took me about 5 minutes to make but looked nice and the day and served the purpose of preventing my nephew from dropping the rings on the floor.

Whilst in Glasgow I managed to make it to Mandors and picked up some souvenirs.

image

Petrol coloured embossed scuba fabric and stretch denim (for another pair of Ginger jeans) with stars on it.   I’ve already made up the scuba fabric into a Grainline Studios Morris blazer.

image

Love love love this jacket.

As soon as we got back, I needed to get behind my sewing machine; you know the itch that you can get sometimes. I quickly made up this dress for my daughter.

image

image

It’s made using pattern W, the pinafore, from the Girls Style Book by Yoshiko Tsukiori and she really likes it. The fabric I used was a medium weight border-embroidered denim that I found at a local car boot sale and managed to pick up about 3 metres for £3. I so do love a bargain. I’ve also made a Grainline Studios Moss skirt with this fabric but sadly I made the waist a little too big and it falls down.

image

After the Glasgow trip we came home to take our children away to the Isle of Wight ‘glamping’ in a safari tent. This tent was epic!!! The bed was more comfortable than mine at home.

image

image

We had a great time and will definitely be going back.

Now I come to the thing that has kept me most busy over the last few months… I’m moving to Warwickshire, Rugby to be precise, at the end of September. Due to changes in my husband’s employment he decided to go for a job with his old company in Leamington Spa. I have also got a new job, still Social Work, but a promotion and I should have more free time and a better work life balance so I’m looking forward to it.

After we had already decided on moving I discovered that Warwickshire is a regular mecca of sewing bloggers/seamstresses. Roisin from Dolly Clacket lives in Leamington Spa, Sarah of a Million Dresses lives in Warwick as well as Ali Goddard from Twitter. I’m sure there’s others I’ve missed.

Coventry and Birmingham are just a stones throw away from Rugby so I’m looking forward to exploring the fabric shops locally as well as the Birmingham rag market and making a trip to Guthrie and Ghani.

We move at the end of September with me still in my current job until mid-October and having to stay with friends in Hampshire until I’ve worked my notice period. Therefore I may continue to be quiet in these here parts for the next few weeks. I promise sewing is still going on.

Three Amazing things

Do you ever make a project that really doesn’t turn out the way you planned, but you still learn loads and are super pleased with the outcome, despite the garment’s inevitable destination of the charity shop bin? That’s exactly what happened to me with the project I made a week or so ago.

image

I wanted a floaty, breezy top to go with the Capri trousers I’ve recently made (yet to be blogged, as is half of the current contents of my wardrobe). As a Base for the pattern I used the Silk Woven tee pattern from the Great British Sewing Bee Fashion with Fabric book (3rd series book). I’ve already made this pattern once and the only adjustment I needed then for a well fitting garment was to drop the bust darts by 1.5″- a common adjustment for me; not sure if it’s because of my long body or because my ladies have headed south after years of ballooning weight, weight loss, 2 pregnancies and breast feeding.  In order to get the floaty feel I wanted I slashed and spread the sleeve pattern piece to give me a flutter sleeve,  added an inverted box pleat to the centre back and gave it a subtle high-low hem.

Now, the pattern hacks worked just as intended but didn’t give me the garment I envisioned on my head. It doesn’t have as much flare and float as I wanted and the sleeves aren’t fluttery enough and are a strange length. However, I learnt some cool tricks during the construction. Well, not so much learnt as finally put things into practice that I knew existed.

As the fabric I used is soft and floaty I decided to use French seams throughout.  Although I buggered up the shoulder seams, don’t look too closely on the inside; my brain apparently won’t allow me to stitch with wrong sides together. The astounding thing is that I actually set in the sleeves with a French seam too.

Amazing Thing number 1:

image

image

Previously when I’ve made garments with French seams that have set-in sleeves I’ve chickened out when it comes to the armscye and just used a plain open seam. This time though I thought that the width added to the sleeve through the flutter sleeve hack might make it a bit easier and I was right. It looks soooooooooooooooo neat on the inside besides the aforementioned shoulder

image

Amazing thing number 2:

Frixion marker pens. I saw a post on these pens a while ago and immediately put them in my Amazon wish list.  If you haven’t heard of these wonder pens before they are heat erasable. So, if used to transfer pattern markings to fabric the marks then iron off easily in the process of pressing your garment. So cool and so much better than those cruddy air erasable pens- with mine the markings seem to disappear within seconds, making the whole marking process pointless.  I was feeling a bit glum last week so accidentally on purposely hit the buy now button whilst at wotk, along with a japanese girls sewing book.   These pens go on easily and are very visible and clear. They do not fade or rub off or coat your machine with dust (a bugbear of mine when using tailor’s chalk). And then when you’ve stitched your dart, or whatever, with a wave of a warm iron there is no sight of a mark to be seen. They are my new favourite non-sewing intended Sewing gadget.

image

Amazing Thing number 3:

Last but not least the other fab thing I discovered in this ‘meh’ project was the rolled hem feature on my overlocker. I’ve attempted to use this before but I was too lazy to remove a needle from the machine (the rolled hem feature uses a three thread overlock stitch) and forgot to remove the stitch finger, which resulted in a whole lot of rubbish looking hem. This time I dug my overlocker manual out from the bottom of the craft box in which it resided and set the machine up properly. OMG! How cute is the tiniest hem in the world! And so lazy to complete too- just stick the fabric under machine and put your foot down- my favourite kind of hemming.

So, although this project was a bit of a wadder I enjoyed the things I learnt from it. What about you? Ever made a garment that was a disaster but taught you lots? Please share your stories in the comments below.

Seamstress Erin: Monsterwear Pattern Testing

I have been following Seamstress Erin  for quite a while now and when I saw that she was starting a line of patterns and needed testers I jumped at the chance.   I love Erin’s quirky sense of style and was sure that whatever patterns she produced would be fun to make and wear.

So I volunteered as a tester and before I knew it the amazing Monsterwear hood and mittens pattern pinged into my inbox How cool are the versions that Erin has made?

The pattern calls for faux fur or fleece material and I knew I had some fleece in the stash that had been passed to me from Tobi’s grandmother, Big Nana, so I immediately cut this out.   Unfortunately I only had the time to make the hood before the feedback deadline, but I do have the mittens cut out waiting for me to stitch up.

The hat is described in the pattern as a lined hood-style Faux fur hat featuring in-seam ears and ribbon ties.   I used the tester version for my version, which I received for free in exchange for testing and feedback*, and I know there have been some changes to the pattern as a result of testing.

The hat is a really quick and fun make and I got lots of smiles from my work colleagues and passersby on the day I wore it to work.

IMG_3807-0

It also goes perfectly with the infinity scarf I made from the same fleece over a year ago.

IMG_3808-0

Unfortunately Maya, my 5 year old daughter, spotted the hat and has completely fallen in love with it and so I am destined to never see it again.   My 4 year old son, Eli, has also asked for one for himself but the only fabric I have that is suitable is more of the same blue spotted fleece.   I think we might look like the Brady bunch if we’re all wearing accessories made of the same fleece. I’ll have to get some fun faux fur.

IMG_3811

I wont go into the construction process too much as I used the tester version and there are significant changes, as I said.   But if you want to have a quick fun project to make, that is sure to raise a few smiles, go grab yourself a copy at Erin’s shop.

Ninja Palazzo Pants

I’m a bad blogger.   I’ve got pics all ready to rock and roll but no text typed.   I don’t know about you but when I get home from a stressful days work and it’s already dark outside all I can motivate myself to do is snuggle up in front of the television and drool over Idris Elba in Luther.   I’m not good in the Autumn/Winter anyway and suffer from a bit of Seasonal Affective Disorder, so my mood and motivation are even lower in the dark days.

Anyway, there has been something this month that has really kept me motivated, helped me meet loads of new seamstresses and kept me inspired.   It’s #BPSewvember over on Instagram.   If you haven’t seen it, this is an idea that Amanda from Bimple and Pimple came up with.   There is a sewing related theme for each day of the month and the idea is to post pics relating to the theme each day.   As I type we’re on day 20 and amazingly I have kept up and posted a picture each day.   I have also lost at least 50% of my productive working day by browsing that hashtag.   I think I’ve said before that I don’t really have any friends who are into sewing so getting a sneak peak into others sewing lives is a rare treat.   Check it out if you haven’t already, it’s addictive.   Here’s a selection of some of my pictures this months so far.

The Make

So, onto some actual sewing then.   You may recall me saying when I posted my Welt Pocket Tutorial, that I was working on a pair of culottes from a Burdastyle magazine.   Well, the culottes were more of a wearable muslin for the real deal, palazzo Pants.   I used this pattern from burdastyle for this make, although it came from my copy of the magazine rather than the website.   For the wearable muslin I used a cream poly cotton that was in my stash which I believe was given to me by a colleague.   My measurements were slightly larger than the largest pattern in the magazine so I had to grade up the pattern slightly.   I added two inches at the waist and three inches at the hips.   Construction was actually fairly straightforward once I had deciphered the aforementioned welt pocket instructions.   Surprisingly the fly zipper instructions were much clearer than the welt pockets.   This was much first ever fly zipper and I really couldn’t get my head round it until I read Jen’s tutorial over at the Grainline blog.   Thinking of the fly zip as a lapped zipper with an underflappy bit helped me make sense of it all and it came together fairly easily.

Just noticed a hair on the fly on this zip- sorry guys I moult like an Alsatian.

These were intended as a muslin but I was so pleased with the finish I decided to chuck them in the washing machine with some Pillar Box Read Dylon dye to see if I could make them wearable.   They came out somewhat pink but I still quite like them.

I know culottes seem to be all the rage and the moment and Lily Sage & Co has put up some amazing versions here, here and here (she’s even just made her daughter a version here) but I’m just not sure if this style suits me.   It certainly confuses my children as they have an unhealthy obsession with crawling on the floor under my skirts and they cannot work out why it doesn’t work for the culottes as they look so skirt-like.   They are growing on me the more I wear them though.   The fit was so good once I’d made them up that I stuck with the flat pattern adjustments I’d made for the culottes to make up the real deal palazzo pants.

The dreaded welt pockets.

Fabric

For my palazzo pants I used a navy blue something that I was given by a colleague.   I have no idea what the fabric content of this fabric is but it’s a bit scratchy, like a coarse wool.   I think it’s synthetic though as it didn’t press brilliantly.

Construction

For my wearable muslin I had a hard time remembering which direction the arrows for the very wide front pleats pointed so I laid them out towards the centre front as I preferred the shape that this gave the front of the culottes.   However, the pleats are so wide they got a bit in the way of the fly.   So, I double checked the pattern when I made up the trousers and sure enough, they’re meant to be laid the other way.   Doh!   Again, a pretty straightforward make once you have mastered welt pockets and fly zips.

I used a new technique to hem the palazzo pants as I’ve just bought a load of new presser feet for my sewing machine and in amongst these was a blind hem foot.   So, I decided to avoid the inevitable hand sewing and stitch a blind hem on my machine.   This is a bit more visible than it should have been because the thread colour was a little too light for the fabric.   However, I like the finish and it was quick and relatively easy.   The blind hem foot it my new best friend.

Fit

Look how wide these trousers are.

I feel like a ninja in these trousers and have pulled a lot of very silly poses in the office while wearing them to work.

I had no problems fitting these trousers whatsoever.   I think it’s because they’re so wide that it compensates for any fitting issues there may have been.   The top I’m wearing with them is another matter though.   It’s my third version of Gertie’s Bow Blouse from her first book “The guide to better sewing”.  So as not to overwhelm you I’ll blog this separately at some point.

Verdict

I’m not sure about these trousers.   I had visions in my head of looking elegant and sophisticated but think it comes off like a ninja tree-trunk as they fall from my widest part, my hips.   They’ve only been worn to work once and I still may shorten them to make them 3/4 length culotttes.   Particularly as I keep nearly killing myself when going up and down stairs as my feet get tangled in the excessive flappy fabric.

Cost

Culotte length:

Fabric: Free

Zip: 69p from a charity shop

Thread, interfacing and buttons: all in my stash

Dylon dye: Approximately £7

Total: £7.69

Palazzo pants length:

Fabric: Free

Zip: £3 approximately

Thread, interfacing and buttons: all in my stash.

Total: £3


Sewing on a Budget

I am queen of the awkward silence! It’s been too long since I’ve posted but I’ve been sewing away and there are some posts lined up for the coming weeks.   Meanwhile, here’s my thoughts on Sewing on a Budget…

Many people get into sewing with the thought that it will help them save money on their clothing budget but quickly realise that the cost of fabric, notions, and tools can add up and all of a sudden you’re looking at a dress that cost you half of the national deficit to make.   There are so many beautiful fabrics out there that it’s easy to get sucked in and order all the pretty things and start cultivating your purse as a home to the local spiders, rather than where your money resides.   However, there are ways of successfully sewing on a budget and with a bit of leg work and savvy spending you can have a wardrobe full of beautiful handmade clothing and not have to organise a bank heist to fund it.   Here’s a few of my tips.

Sewing Patterns

The online sewing community has exploded over the last few years and there are so many free patterns and tutorials online that sometimes it feels as though you will never have to buy a pattern ever again.   In fact, it’s only in the last three months or so of my sewing career that I have succumbed to buying any patterns brand new.   Here’s a few of my favourite free tutorials from the interwebs.

Colette Sorbetto top

By Hand London Polly vest

Swoon patterns scarf neck cardigan

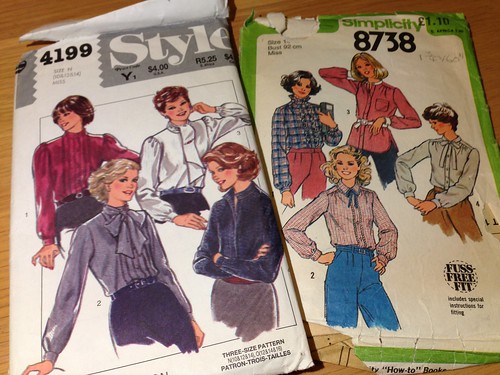
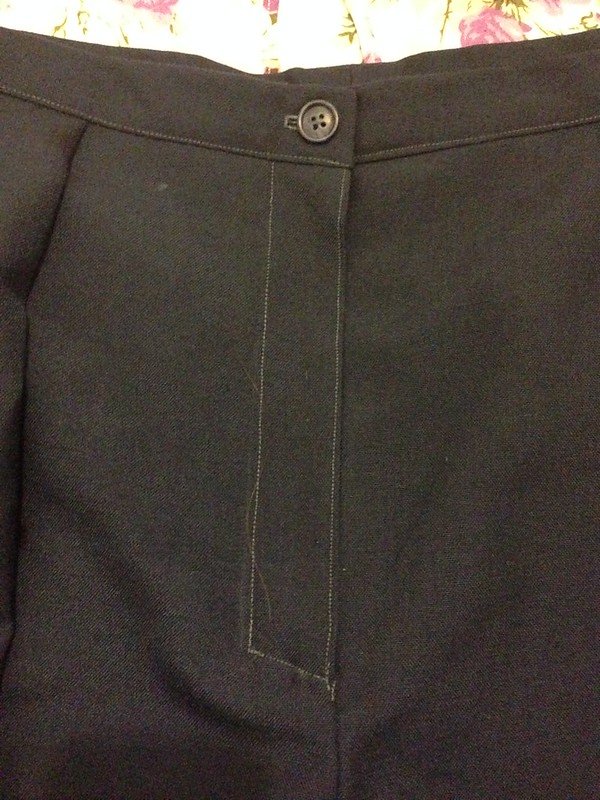
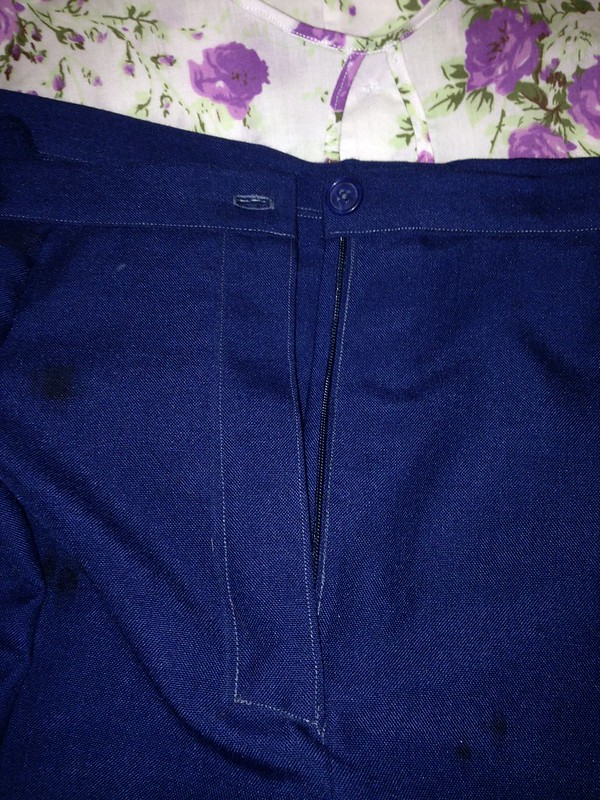
I’ve also managed to pick up pattern bargains in the local charity/thrift shops.   Here’s a few examples.

Equipment

If you are new to sewing and considering purchasing your first machine see if you can borrow a machine or try out a class before committing to purchasing your own. You may find that sewing just isn’t for you and it’s much cheaper to realise this before your fork out your hard earned pennies on the shiniest all singing all dancing machine.   If you do decide to take the leap and buy your own, start with a basic model.   All you really need to begin with is a straight stitch with adjustable length, a zig-zag stitch and a button hole option.   The machine I use is this basic model from Hobby craft which was an affordable price and had all the functions I needed at the time.   18 months on and beginning to tackle intermediate patterns, this machine still does everything I need it to do.

There are also often inexpensive alternatives to the multitude of gadgets you suddenly feel you must own to be a ‘real’ seamstress.   For example:

  • Use a kebab skewer or knitting needle instead of a point turner (I always have a bamboo skewer around somewhere)

–          Use a safety pin to turn tubes rather than a bodkin

Fabric sourcing

Many sewist’s happy place is their local fabric shop and they like nothing better than spending hours on end browsing the racks of beautiful bolts of cloth.   I can find this a bit overwhelming at times and I cannot see the wood for the trees.   Plus fabric in some of the higher end shops can cost an arm and a leg.   Now, I’m just learning fitting skills and I don’t think I can work out how to make something fit without all my required limbs.   Therefore, I recommend a bit more leg work in your fabric shopping and here’s my tips:

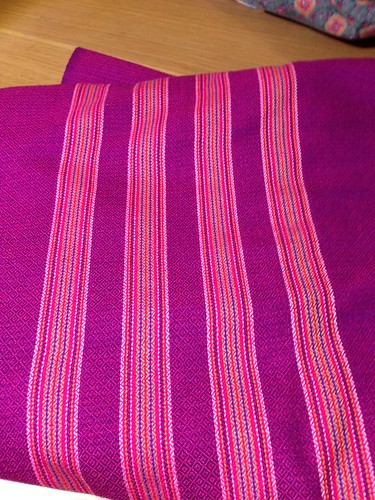
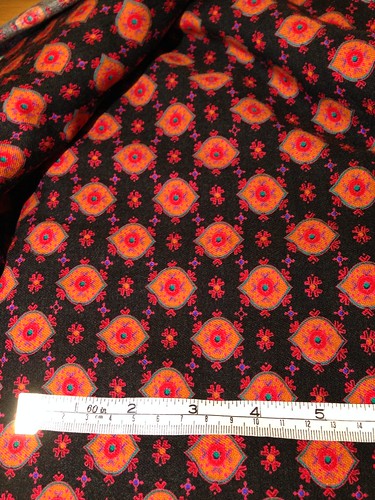
Charity/ Thrift shops- It seems to be that a lot of our local highstreets are being taken over by charity shops as more an more of our conventional retail moves online.   These stores can be a treasure trove and they often have lengths of fabric that are frequently underpriced.   There are also often vintage patterns in really good condition.   Here are some of the finds I have had.

I find that you have to think a bit more creatively with fabric bought this way as you often don’t have labels telling you fabric content and the colours/patterns may not be exactly what you are looking for.   For this reason, I normally grab any bargains I can find and consider sewing pattern second.   This can mean a risk that your fabric stash would grow exponentially without set plans for it, but this is just the way I like to work anyway (although Tobi may have other ideas and, as previously mentioned, has exiled my stash to the garage).   I would suggest trawling your local stores on a regular basis to keep an eye on new stock coming in.   If you find something that you wouldn’t be caught dead wearing it’s still worth considering buying it for use in toiles/muslins.

Freecycle- I’ve posted before about the finds I’ve had through freecycle.   I have found in my local area that fabric doesn’t come up regularly on freecycle, but it’s always worth asking if anyone’s got stuff hanging around that they don’t want anymore and that can be put to good use.

IMG_3147

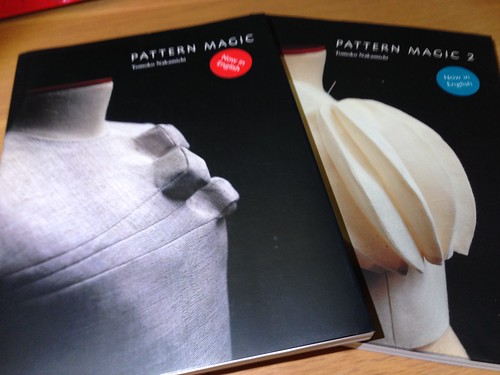
Car boot/ garage sales- people seem to be becoming more savvy about the increasing popularity of sewing and other craft activities and I have found sellings increasingly bagging up sets of buttons etc. and asking for more for their items than previously.   However, you can still get complete bargains.   Here is my most recent find from my local car boot sale- Pattern Magic and Pattern magic 2 for £1 for both books!   These were brand new and unused too.

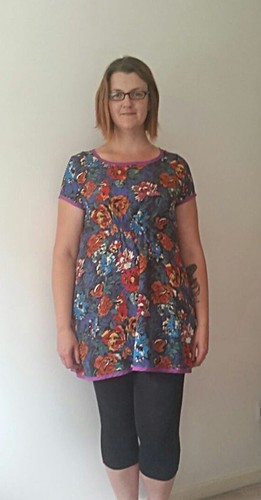
Unconventional sources/ refashioning-  most supermarkets now have extensive ranges of sheets and bedding and these can easily be used as yardage. I have made three dresses using sheets purchased in charity shops- the Dr. Who Emery Dress, The Chemery dress and an unblogged 50’s style prom dress.   Sheets are also great for toiles.   Again, look in charity shops, not just for yardage but also for any of the RTW clothes that catch your eye.   With a bit of imagination these can be changed into beautiful new outfits.   There are several blogs that are brilliant for refashioning ideas.   Check out Refasionista , New Dress a Day  and Charity Shop Chic.

Other- Gumtree, Facebook and Yahoo groups can also be a good source for fabric.   If you have a network of local sewing friends see if you can arrange a fabric and pattern swap party for your unwanted items.   Several online stores also provide money off vouchers if you subscribe to their mailing lists.   Shop the sales, remnant bins and remnant bundles online- you can sometimes grab a bargain.

Other hints and tips

  • Keep your scraps.   They’re great for contrasting pocket pieces, bodice lining or for piecing a whole dress together.
  • Play with your cutting layout to make the most of the fabric you’ve got. Fabric estimates on sewing patterns are often an overestimate.
  • Buy the highest quality fabric/notions you can afford and these wash better and will last longer so you get more wear for your money.
  • Set a budget- I try to not spend more than £20 a month on everything related to sewing.   This helps to stop the spending getting out of control and helps you to be more aware of where those costs are adding up.
  • Shop your stash before you buy anything new- there could be the perfect length of fabric just waiting and the bottom of your stash for you.

–          Be aware of your style and what suits you and stick to it.   Coletterie have had a recent wardrobe architect series to get you thinking about your style.   If you stick to what you know makes you look and feel good you will get more wear out of it and your garments are less likely to be worn once and then remain languishing at the bottom of your wardrobe.


I think that’s about it for my sewing on a budget tips. Do any of you have any hints and tips you’d like to share?

Slinky floral dress

The last two weeks have been pretty exhausting as we moved house on the first week of our holiday, with two children on the first week of the summer holidays and no money to hire a van.   Luckily I have a mum-mobile, a seven seater with a massive boot when all the seats are down.   Most of our stuff was moved in countless car loads with just the main bits of furniture being moved in my sister-in-law’s boyfriend’s van.

We’re all in and unpacked now and the best bit is I get my own sewing space.   Well, it’s also a dining room, kids messy play area and generally ‘other’ room but I do have my machine set up in the corner and all my sewing supplies easily at hand… except my fabric stash which Tobi has relegated to the garage!!!!!   I have sleepless nights thinking about spiders and other creepy crawlies ruining the prescious hoard.

New Sewing Space

So, the first week of my holiday did not involve much sewing and then the start of the second week was taken up with unselfish sewing- you know the thing I said rarely happens round here.   I had two skirt alterations for work colleagues, a slip cover for an outdoor sofa and finally finishing a Getie Shirtwaist dress for my sister-in-law before I was able to do anything for my family and then I had to make new cushion covers to replace very tatty looking covers I’d made from old t-shirts about a year ago.   I used the Fat Quarter pack I won in a competition on Twitter from Sew Magazine.   I’ve been keeping these FQ’s since I won them, hoping I could come up with some ingenious way to turn them into something wearable as they’re so lovely.   But alas, I came up a blank and, seeing the first of the Fat Quarter challenges completed at Oonaballoona’s blog, I can see it’s no mean feat using FQ’s in garment making.   But we’re all pretty pleased with the results and at £6 for four new cushions (just the cost of new cushion pads at £1.50 each) you can’t really go wrong.

I did finally get to my favourite activity though, Selfish Sewing.   I posted recently about the Spring Sewing Swap goodies I received from Sew Actually, organised through Kestrel Makes blog and I decided to tackle the gorgeous floral satin that I melted over when it arrived.   Andrea sent this to me as a challenge as I had applied for Season Three of the Great British Sewing Bee and in season two the first few episodes focused on different types of fabric, silk being one of those.   Although I believe this fabric is polyester rather than silk, I can tell you it was definitely a challenge.

I wanted to let the fabric speak for itself and also not give myself too many headaches so I chose a fairly simple pattern that I had been gifted by a colleague at work.   It was the free ‘easy dress pattern, from May 2014 edition of Prima magazine.   I wasn’t sure about the style on me and thought it might look a little frumpy, so I decided to make up a wearable toile to test the fit and see if it looked any good on me.   I used a poly crinky crepe which I scored in a charity shop a while ago- I got about 5 metres of it and have already made a maxi skirt and had a good half metre left once I’d cut out the tunic length.   I wish I could remember which size I cut but I know that I had to grade to the size above from the waist down, which is usual for me due to my pear shaped frame.   I think it was a medium top half and large from the waist down.

The toile was very quick to sew up.   I substituted the elastic channel the pattern calls for for shirring.   I thought it would look a bit odd with a rectangle topstitched just under my boobs and lower back and shirring worked well as a more attractive alternative.   The pattern also directs you to use bias binding as a facing but I really liked the colour combination between the purple binding I had in my stash and the fabric so I bound the edges instead, including the hem.   This version must have only taken me about an hour and a half to make and I was proud of myself that I didn’t need to look at the instructions at all- Sewing level up 🙂

The construction of the final dress was not so straightforward.   This fabric is very very slippery and was impossible to keep on grain when cutting out but I did the best I could and neatened up my edges after cutting the main pieces.   Andrea had warned me that sharp pins would be required and had sent me a new box of pins to help.   Sadly I still had a few snags in the fabric and, due to the printed nature of this satin, it left little white pull lines- you may be able to spot one on the hem picture below.   It’s hardly noticeable though and I’ve realised since I’ve been sewing that I always notice the imperfections so much more easily than anyone else.

For once I actually considered construction before I launched myself at my sewing machine and chose to use french seams throughout, except the armholes which I was too nervous about and so used a plain seam, trimmed the seam allowance down by half and used a narrow zig-zag stitch for the edges.   In hindsight I’m glad that I made this decision because I made a complete boob inserting the sleeves because the fabric is so slippery.   I ended up with sleeves that were far too tight and looked like I was going to hulk out of them at any moment.   I also thought the length of the sleeve looked a bit strange and frumpish with such lovely delicate fabric.   Therefore my solution was to go at the sleeves with a pair of scissors and turn them into cap sleeves.   As unpicking this fabric can also cause trauma to the weave I chose to make the alteration without removing the sleeves.   I measured down three inches from the shoulder point and drew a line with a hope and a prayer that I could get them matching on both sides.   I then trimmed the lower sleeve away at the underarm seam line and across the newly marked sleeve line, also trimming off the majority of the seam allowance in the under-arm portion of the armhole.   I then used satin bias binding that I had in my stash from my grandmother (who I never knew to sew so I have no idea why she had so much sewing equipment and haberdashery) to face the new armhole and sleeve edge.   The sleeves are slightly uneven but I like the new look and think it suits the fabric better.

Hemming was another trauma.   Due to my inability to keep the fabric on grain whilst cutting, my original hem line was very very uneven.   I don’t have a dress form so I begged Tobi to help me with marking an even hem line.   He was annoyed after the first three pins as he quickly discovered my frustrations with fabric that just doesn’t want to sit still.   I then cut off the excess fabric as straight as I could ready for hemming.   I had intended to make a hand-rolled hem but my first stitch, picking up just one or two threads, pulled out the threads and made a horrible snag.   I quickly abdandoned that idea and decided to do it on the machine.   I rolled over the hem edge approximately 1/8″ to the wrong side and stitched close to the edge and then repeated the process, giving me a nice narrow hem.   Horribly horribly uneven, but a hem none-the-less.


Shirring

Neckline Bias Facing

Teeny tiny machine rolled hem

Despite all my griping about this fabric, it feels divine to wear (apart from the static which makes it cling to my legs but is easily resolved by wearing a slip underneath) and it got the Tobi seal of approval when he realised how touchable it is.   It felt like an accomplishment to complete it too, despite the frustrations along the way.

I have since pinned some tutorials on my Pinterest Sewing tutorials board giving hints and tips for sewing with slippery fabrics.   Have any of you got any hints and tips to add?   Any slippery fabric disasters or triumphs?

Garden Party Dress: rescued and hacked

A little while ago I had a minor meltdown whilst trying to get a free dress pattern, the Garden Party Dress by Honig Design, to fit me without making my bossom reminiscent of Madonna’s Jean Paul Gaultier cone bra.

20140606-112700-41220739.jpg

I went through a million toiles and in the end gave up. I think there were several problems with the pattern for me and it just didn’t work in the fabric I had chosen (Medium weight 100% Cotton which may have been intended as curtain or upholstery material from Big Nana’s stash). However, I had already cut the skirt pieces for the dress and I loved the fabric so much I wanted to somehow turn this into a wearable garment.
Behold the pleated button-down skirt.

20140606-113041-41441660.jpg

I used the front skirt panel for the back panel and used this tutorial to add a button placket onto the front skirt piece as I fancied a button-down skirt a la Tilly and the Buttons. I then drafted a curved waistband to add on to the skirt pieces and used the pocket pieces from the Emery dress to add pockets to the dress, because who doesn’t want a pocket. I used a constrasting yellow fabric for the pocket bag as I thought it brought out the yellow leaf pattern design and really popped.

20140606-113522-41722791.jpg

I used my overlocker on all the seam allowances. I think my choice of thread for the overlocking on the pocket pieces was a bit dubious as I chose yellow and orange. When I was snuggling up on the sofa with my husband and the pocket bag peeked out from under the skirt he thought I had a duster under my skirt.

This fabric has so much body in it the pleats give it a great, full shape and it could practically stand up on its own. It’s a fun little skirt and I had great fun teaming it up with a purple t-shirt and my yellow scarf neck cardi. Tobi thought this colour combo was a bit over the top but I love colour and I think it works. What do you think?

20140606-113652-41812519.jpg

I loved this skirt so much I immediately decided to make another and remembered that I had about 1.5metres of cream and navy polkadot viscose/rayon in my stash leftover from my portrait blouse and I thought it would make a great drapey version of this skirt. Now, this fabric was super shifty and I could not get the polka dots lined up and keep them that way when attempting to cut on the fold so I decided to cut on the flat and traced a mirror of the back pattern piece to tape onto the existing piece, thus making the shape of the unfolded piece required. I used my rotary cutter and mat but this was still a bitch to cut and, if you look at the line of polka dots going down the front placket, you can see that this went way off straight.

20140606-114936-42576528.jpg

I think I would have committed hari kari if I tried to get it straight any longer so I figured that it would do. I made absolutely no attempt to pattern match because this fabric was driving me crazy.
Construction was exactly the same as the skirt above but the finished result looks quite different due to the different body and drape in the fabrics.

This fabric is a little sheer and so I decided to make a half-slip to go underneath it. I used this tutorial fromGertie’s blog for better sewing and I had some lovely soft jersey, in a light green, in my stash that I bought in a charity shop. There was about 2 metres at the bargain price of £2.50. I also had some stretch lace in the stash which came from Big Nana. I had a bit of trouble in the construction of this- I overlocked the side seams and attached the elastic (from stash) with no massive problems, although Gertie’s tutorial says a good steam after attaching the elastic should shrink it back but, I think because this elastic is a bit old, it didn’t want to fully contract back. The problems really came when attaching the lace. No matter what tension I put my machine on I was still getting massive loops of thread on the wrong side and I didn’t notice until I sewn one side of the lace down already. I rethreaded the machine and it resolved the problem, thankfully. This slip is so comfy to wear due to the stretch fabric and I can go out in confidence that I wont lose my dignity (if I ever had any) if standing with the sun behind me or if there’s an errant gust of wind.

20140606-115315-42795054.jpg

I’m really happy with these projects. It was my best attempt at drafting a waistband and it fits really well. The only thing I’d do differently next time is to do my buttonholes from top to bottom rather than left to right as it pulls open a little at the waist.
Have any of you ever managed to rescue a project that was heading for disaster?

Me Made May 2014 Pledge

MMM14logolarge


When I started my sewing journey this time last year, I was just in time to see the fun being had for Me Made May 2013.   If you don’t know what that is head over to ‘So, Zo’ to see what it’s all about.   It’s basically a month to give our handmade wardrobe a proper showing off to the world, to reconnect with our creations and fall in love all over again.   Some people pledge to wear a me made creation every day, or specifically stick to a colour palette etc.   I certainly had not been sewing for long enough last year to be able to take part in this but I know have a fairly healthy amount of handmade clothes in my wardrobe that I wont have to go naked for the majority of the month.   So this year, I’m going to take part.

‘I, Louise Tomlinson-Sylvest of Sewcial Warrior, sign up as a participant of Me-Made-May ’14. I endeavour to wear my handmade creations at least four days a week  for the duration of May 2014’

I’ve been a bit conservative only going for four days a week, but a lot of my home-made items are more formal, for work, and I don’t really want to pledge to wear me made every day and find that I’m wandering round at the weekend trying to go to the park with my kids in a super snug pencil skirt- not very practical.   If I can manage more than four days a week I will.   I’m going to try to document my outfits throughout the month, probably on Instagram, and will post a round-up at the end of the month.

I’m really looking forward to this month.   I’m not going to panic sew in the lead up t Me Made May but there are a few items I have planned that I’m actually lacking in my wardrobe so will hopefully help me boost my ability to wear the majority hand-made through the month.

Enjoy everyone.

Somewhere over the Rainbow dress

20140401-224332.jpg

Where’s Toto gone? My work colleagues dubbed me Dorothy the day I wore this to work.

I’ve just had a glorious four day weekend, with Friday and Monday off to use up the last of my annual leave before the new year starts. Boy did I need that time off. I’m not going to talk about work here as this is my little space to get away from it but it’s safe to say I have a stressful job and some time away is bliss. Anyway, I spent my break creating this beauty and I adore her.

20140401-225027.jpg


Sideways view

The pattern is Gertie’s Shirtwaist Dress from her Book of Better Sewing as I’m slowly working through conquering this book.   There’s some gorgeous versions of this dress around.   I think my faves are this lobster print one (yep, you read that right, click the link if you don’t believe me!) and this cute red gingham version.

I’m pretty proud of this dress.   A year ago when I started sewing again for the first time in 15 years, I would never have dreamt of being able to create something like this but I’m proud to say that I did it.   Usually in my projects there’s something that I look back on afterwards and think I could do better but not on this little number, despite tackling several techniques I never done before – shirring (it was pretty easy and REALLY satisfying – shirring’s going on everything now), in-seam pockets and shoulder yokes.   I think I’m better at sewing than I sometimes give myself credit for.   Look, I even managed pattern matching.

IMG_2913[1]


I did all the  that Gertie called for in the book, barring the sleeve bands – which reminds me I had a nightmare on the sleeves.   Being gingham, the right side looks the same as the wrong side and I clearly didn’t pay attention when assembling the sleeves as, when it came to setting them in I realised that I had two left sleeves and the first I’d set in was appalling out came the seamstress’ best friend, the seam ripper.   But I hand stitched the under stitching on the facings.

IMG_2905[1]

Pretty neat, huh?

The fabric was a light poly cotton from fabricland, again one of the rare pieces of fabric that I actually bought straight from a fabric shop.   It was a bargain £2.50 a metre and I had thought I’d played it safe by buying 4 metres to allow for pattern matching – turns out it was 45″ wide (I’m still not fabric savvy enough to think of these things when buying) and the pattern called for 4 metres at this width anyway.   This meant that, where I’d used a tad extra yardage to line up my stripes properly, I was a couple of inches short and had to cut the front skirt pieces on the cross  don’t think it shows too much.

I could witter on more about the dress but you’re probably bored by now so I’ll say farewell.   I just need to work out what to make next…

Vintage Pattern Pledge progress

Hello all. Hope you’ve all had a lovely weekend and enjoyed the beautiful sun which has finally made it’s way through the rain clouds. I’m so much happier when then sun’s come out and life seems a little bit easier, despite the fact I’ve had two very whiney children hanging off me all weekend.

I thought I’d update you on my Vintage Pattern Pledge. I decided to make Simplicity 7508 from my vintage pattern stash.

20140318-134634.jpg

I chose this because, as usual, the cover sketches look so glamourous and chic that I had to have it. Also one of my sewing goals for this year is to improve my fitting skills and as this pattern walks you through the fitting process it seemed ideal. Plus it was already in my size, more or less.

A muslin was a necessity for fitting and so I dutifully went about cutting it out. The pattern says you need a whopping 3.25 metres for this very simple sheath dress. I could believe that but sure enough when I places the pieces out they were too wide to be able to do them side by side as so I did use just under 3 metres.

20140318-135028.jpg

Luckily, in Big Nana’s stash there is a whole roll of medium weight poly cotton of some description with a hideous gingham and floral print that is ideal for making muslins. It looks grim on though. I quickly basted it togethersans zip. I tell u what, it’s got some weird darts in this design. I shall dub them banana darts as that’s what they reminded me of when I was stitching them up. Long diagonal curving waist darts that are slightly tricky to sew.

I quickly threw the muslin on, without sleeves and roughly held it together where the zipper would be then used my tried and tested fitting method of squinting at myself in my reflection in the patio windows. Erm…. Not good. I looked like a condom full of custard. I promised Joanne of Sew Little Time that I would blog a picture of me in this hideous creation if she’d blog her fitting fail on the Emery Dress she made. However, I clearly can’t wear a half-made muslin to work for my buddy to snap pics for me and the light’s too rubbish in the evening to take one at home so I have ducked out I’m afraid. Suffice it to say that A-line sheath dresses do nothing for me.

I was hoping this dress would be a learning experience for me- working with older patterns (1968 doesn’t seem quite as genuinely vintage as other patterns), fitting and my first non-stretchy set in sleeves. However it has been a learning curve in a different way and I’ve learnt that I need a silhouette with a defined waist otherwise I look like a sausage. I’m being a bit cheeky and counting this as one of my Vintage patterns to count towards the pledge. One down, two to go.

Don’t forget, it’s sewing bee tonight and, as with last week, I will update my Sewing Bee techniques board on Pinterest during the show with tutorials for you to master the techniques they use in the show. I can’t wait to see what they make tonight and who will be saying goodbye. Enjoy!